
X-Wing™ 101: Mission Briefing, Part Two
Guest Writer Jim Chadwick Looks at Casual X-Wing™

"Come with me!"
–Darth Vader
With its highly-detailed and pre-painted miniatures, X-Wing™ allows you to recreate all manner of exciting Star Wars space battles. Streamlined rules allow you to move swiftly through any sort of engagement—from heated dogfights between only a couple of fighters to explosive conflicts between multiple squadrons.
In our X-Wing 101 series, we focus on the different ways you can get started with X-Wing and add greater depth to your Core Set battles. What do you want to consider as you assemble your squadron and plan your attack? After the first of our X-Wing 101 articles focused on the standard, tournament-style skirmish, guest writer Jim Chadwick turned our focus toward the game's casual side with a look at mission play.
Today, we continue this exploration of X-Wing mission play with the second half of Jim's thoughts. Last week's article focused on how you might approach the Core Set's Political Escort mission as a Rebel player. Now it's time to look at the mission from the Imperial player's point of view.
In this mission, the Rebels seek to escort a rogue Senator past an Imperial blockade. To do so, they need to clear a path for the Senator's Shuttle, and they need to draw away as much enemy fire as possible. But the Imperials? They just want the Senator's Shuttle to explode in a hot, fiery mess.
Jim Chadwick on the Imperial Response
There are a number of different strategies that your Imperials can pursue to defeat the Rebels and eliminate the traitorous Senator's Shuttle.
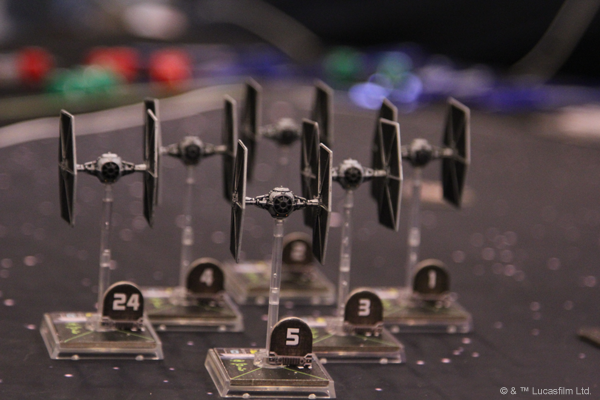
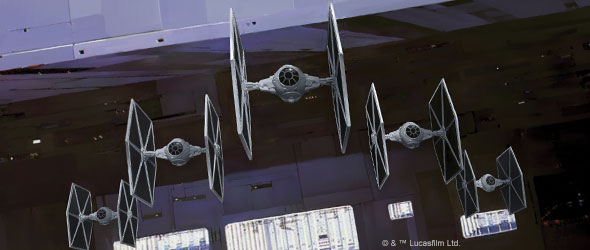
One option is to swarm your opponents with a large pack of TIE fighters. The venerable TIE swarm can number as many as eight TIEs in your one-hundred squad points and often runs with seven. Since we are on a budget as a new player, however, we won’t be able to get the full TIE swarm complement—maxing out at six.
What’s required, instead, is something that can cause enough damage to punch through the enemy's defenses. Speed will be needed, as well, to engage and slow down the escort. But it's important to remember that the Imperials don't want to fall into the deadly trap of engaging the Rebels head-on. The goal is simply to destroy the Senator's Shuttle.
Another idea is to go with a large-base ship that can withstand some attacks and still dish out damage in return. It’s also possible to get your large-base ship in front of the Senator’s Shuttle, forcing it to bump, a tactic that is especially effective when your ship is loaded with Anti-Pursuit Lasers .

I have had this gambit used against me to devastating effect. The Senator’s Shuttle is extremely limited in its maneuvers—it can only perform a speed "1" bank or a speed "2" forward maneuver—and these maneuvers aren't fast enough to clear a large-base ship positioned directly in front of it. If you can set your blocker in front of the Shuttle, your opponent's only recourse is to destroy your blocker.
You can find some other good options among the game's TIE interceptors, TIE Strikers, TIE Advanced, and TIE Advanced prototypes. These ships are fast and can dish out the damage. There are some concerns that the TIE interceptors and Strikers may fall too easily to a lucky Rebel attack. A bad roll or two can see these heavy hitters rendered into space dust.
So the list that I settled on features one of my favorite ways to take out the enemy: ordnance!
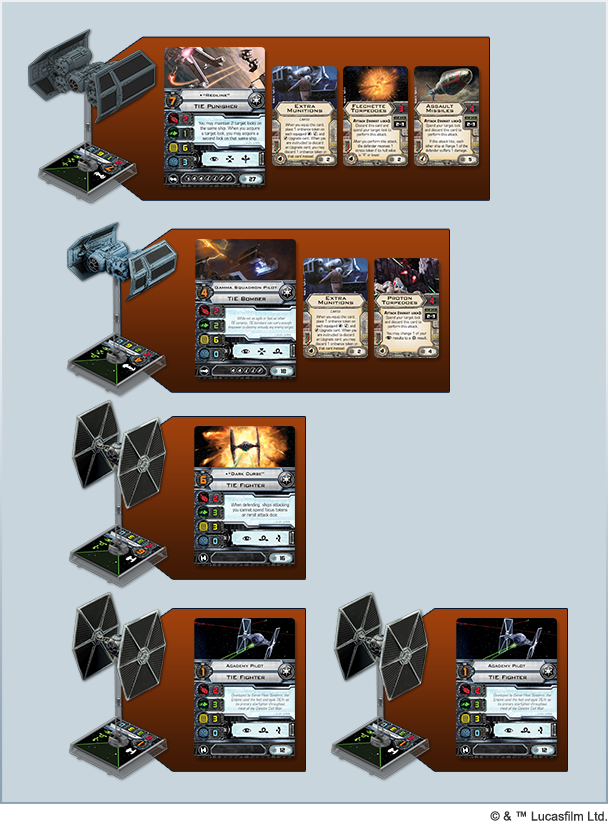
- "Redline" with Extra Munitions , Flechette Torpedoes , and Assault Missiles
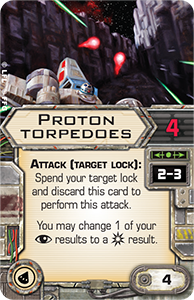
- Gamma Squadron Pilot with Extra Munitions and Proton Torpedoes
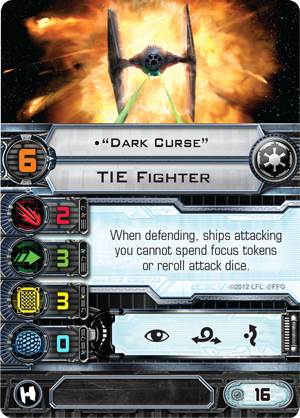
- "Dark Curse"
- Academy Pilot
- Academy Pilot
Total Squad Points: 100
This list can be built with the Classic Core Set, TIE Fighter Expansion Pack, TIE Bomber Expansion Pack, and TIE Punisher Expansion Pack. It also comes in well under our 101 USD budget at 91 USD.
Tailored to Your Mission
While the TIE punisher isn’t the most popular ship in head-to-head, tournament-style matches, it really shines in missions. It’s sturdy enough that it can absorb quite a bit of enemy fire before being destroyed. And in that time, it can unleash quite a bit of damage.
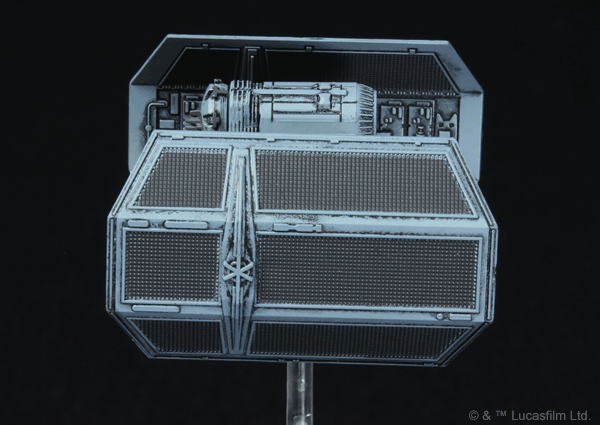
A 360-degree view of the TIE punisher.
“Redline” is a particularly valuable TIE punisher pilot in this mission because he gives you a free Target Lock to modify your dice in case of a bad roll. Also, his Assault Missiles can be used against easier targets and still damage everyone nearby. If Biggs and the Senator’s Shuttle are too hard to hit with all the defensive synergies they have going on, "Redline" can aim for a Z-95 or ARC-170 and splash damage to everyone close. His Flechette Torpedoes are cheap ordnance that roll more red dice than the punisher's main guns, and they force stress tokens upon its targets, even if they miss. This stress can prevent your opponent's Rebel support ships from gaining valuable actions. And while the TIE punisher's dial might suggest that it’s a slower ship, its boost action can help maneuver “Redline” into position to ensure the Rebels don’t get away.
The Gamma Squadron Pilot can deliver some more punches with his Proton Torpedoes, especially since the torpedoes' built-in die adjustment ensures the ordnance makes a big hit. While a TIE bomber can withstand more hits than a TIE fighter, it's still no TIE punisher and will be destroyed rather quickly if it draws focused fire. You'll want to make sure that the bomber starts its attack run away from the enemy’s guns.
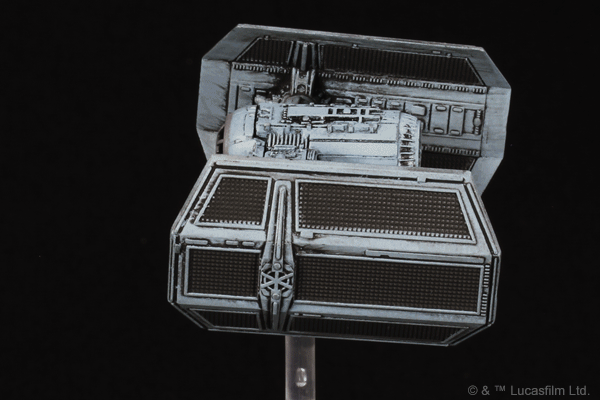
A 360-degree view of the TIE bomber.
Finally, "Dark Curse" and his escort of TIE fighters are there to buzz straight at the enemy and distract them while the heavy hitters move into position. It won’t do to have them move into firing range too early and be destroyed in the first salvo, but good timing can allow you to get those TIE fighters into close range at the right time.
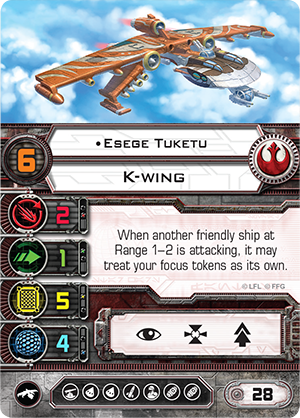
If you can keep these TIEs functional long enough to get into close range, they can fly into position to block the Rebel convoy. The best block is to prevent the Senator’s Shuttle from moving speed "2" forward toward the board edge. But it can also be a really good idea to block the Shuttle's escort ships in order to prevent them from taking actions. If your opponent is using the list we discussed last week, Esege Tuketu won't do much for the Rebel cause without his focus token, and a Z-95 Headhunter or ARC-170 can’t pass the Shuttle an evade token without an action to Protect.

Blocking Esege Tuketu instead of the Shuttle shuts down many of hte Rebels' defenses and may still leave you shots at the Shuttle.
Stay on Target
As the Imperial player, you'll need to think carefully through your targeting priorities. At which ship do you fire your ordnance?
It's worth noting that target locks and ordnance allow your bombers to avoid firing at Biggs. So the immediate thought would be to fire at the Senator’s Shuttle. However, if its wingmates have assigned it two evade tokens, and it can make use of Esege's two focus tokens, you might find that your missiles and torpedoes would be wasted on missed shots.
 As a result, you might find it smarter to fire at other targets, instead. Your TIE fighters will almost certainly be forced to fire at Biggs. And while you can’t guarantee that their two dice will hit, your TIE fighters may still surprise you with the amount of damage they can deal with their constant fire. It might be smart, then, to use your ordnance to help bring down Biggs a lot sooner than your TIE fighters can on their own. Once Darklighter is down, then your TIE fighters are free to target anything and everything else.
Because “Redline” only needs to land a single point of damage with his Assault Missiles in order to splash everyone else with damage, you might find it easiest to damage the Senator's Shuttle by firing first at the Z-95 or another support ship. Because "Redline" will still have a target lock to modify his attack after using one to fire his missiles, the odds are very good that he'll land a hit for at least one point of damage, and it's conceivable that you'd destroy or cripple the Z-95 in a single hit. Taking out the weaker Z-95 means, in turn, that you have a greater chance of landing your shots against on the Senator’s Shuttle in the rounds to come. It might also mean that your TIE fighters will live longer without the enemy wearing them down.
It might be tempting to take out the K-wing and remove a superior support ship, but I would recommend against it. Punching through its hull and shield would take up too much of your ordnance and leave your heavy hitters with only their main guns to remove the rest of the Rebel list. Your resources are finite, and you need to stay focused on the main prize of the Senator’s Shuttle. Choosing to attack the ARC-170 carries many of the same risks as attacking the K-wing, but if you can take out Thane Kyrell in the early rounds, your other ships will likely live longer and contribute more to damage toward the traitorous Senator's Shuttle.
It's All About the Story
Both this list and the one we looked at in the last article work well with the Political Escort mission to create an exciting and compelling narrative in your games of X-Wing.
 Did one of your pilots sacrifice him or herself to ensure your victory? Perhaps "Redline" turned out to be the star of the match, scoring the critical shots against Biggs, the Shuttle, and a support ship or two. Maybe the lowly Academy Pilot or Bandit Squadron Pilot was the star. Was the victory glorious enough that you'd want to decorate your ships with a custom paint job?
No matter who won, there's plenty of reason to reset the game and start over from scratch. Sometimes a bad die roll or a poor tactical decision on one part leads to the other player's easy victory. Flying the same mission again can lead to another exciting and very different game. It’s also fun to revisit the mission as you add more ships to your fleet, adding more options to your potential squad.
X-Wing is a diverse game with a lot of options for how you can play. Exploring all of them keeps the game interesting and worth playing.
Jim Chadwick has been playing tabletop games since 1978 and X-Wing since Wave I. He's an ambassador for casual X-Wing and shares his thoughts on The Shuttle Tydirium Podcast, which he hosts. He contributes to the FFG forums as heychadwick.
No products found.
Related News


Flight Academy: The Galaxy's Greatest
An Interview with the 2017 X-Wing™ Coruscant Invitational Champion
