
New Tactics for the Rebel Alliance
An Imperial Assault Skirmish Game Strategy Article

“General Solo, is your strike team assembled?”
–General Crix Madine, Star Wars: Return of the Jedi
The Galactic Civil War rages across the galaxy. The Rebel Alliance fights desperately to maintain the momentum granted by the destruction of the Death Star, while the Empire brings its massive reserves of soldiers into play to crush the Rebellion. Clashes between Rebel freedom fighters and Imperial Stormtroopers are common, while Mercenaries fight for whoever can pay. Even the simplest mission has the potential to erupt into a firefight.
In Imperial Assault, the skirmish game invites you to partake in thrilling battles and command a strike team of brave soldiers fighting alongside classic Star Wars heroes and villains. The recent release of the first wave of Ally Packs and Villain Packs for Imperial Assault has brought new tactical opportunities for every faction. In today’s article, we’ll present a skirmish list that takes advantage of these new units and tactics available to the Rebel Alliance.
The General’s Strike Team
The warriors of the Rebel Alliance SpecForces excel at staying mobile during their operations, which commonly center on taking down a high-priority target. A prime example of these tactics is the Rebel raid against the Imperial shield generator on the forest moon of Endor in Return of the Jedi. An elite SpecForces strike team can take down huge enemy targets by harnessing these hit-and-run tactics, and you can make your own SpecForces strike team in Imperial Assault.
 This example strike team is composed of the following Deployment cards:
Han Solo is the leader of your strike team, and in many cases, he’ll be dealing the most damage to enemy forces. Both of his surge abilities increase the amount of damage that he can deal in combat, while his Return Fire ability gives you the chance to make an attack on your opponent’s turn. What’s more, Han’s Distracting ability offers an additional evade to all adjacent friendly figures. While the rest of your strike team stays mobile and avoids getting tied down in melee combat as you work to defeat your opponent’s most powerful figures, Han Solo can run interference for the rest of your team, making punishing attacks against your opponent’s key figures.
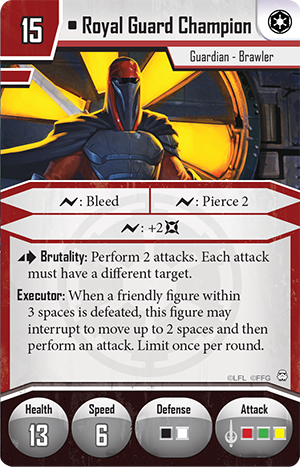
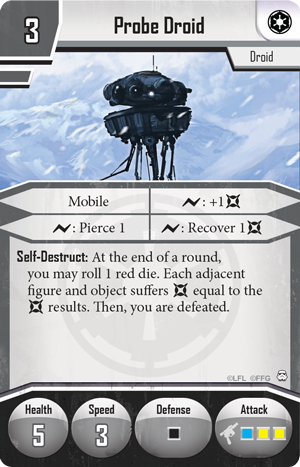
The majority of your figures on the board with this list come from the Rebel Saboteurs and Rebel Troopers. The Rebel Saboteurs are highly adaptable, excelling at battling an array of enemy lists. A popular type of Imperial Assault skirmish list focuses on supporting a single large figure such as Darth Vader , the Royal Guard Champion , or an AT-ST . Other lists plan to swarm your forces with large quantities of low-cost figures, such as Stormtroopers and Probe Droids . The Rebel Saboteurs have the tools in their arsenal to deal with both threats. Against a single, large figure, you can use Stun to reduce that figure’s actions and Pierce to punch through its armor. When battling squads of troopers, Blast can quickly spread damage through enemy ranks.
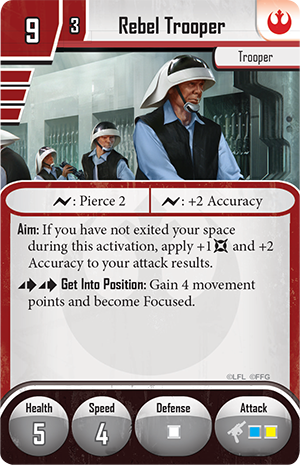
The Rebel Troopers provide support for Han Solo and the Saboteurs. By using Get Into Position early in the game, you can Focus your Rebel Troopers, inviting you to concentrate firepower on a single, crucial target or spread damage through enemy ranks. In addition, the Aim ability naturally supports the highly mobile fighting style of this list. By firing first and then moving, you can take advantage of the Aim ability every turn and stay ahead of your opponent’s melee fighters. You may also choose to blockade key paths on the skirmish map, gunning down any who come too close.
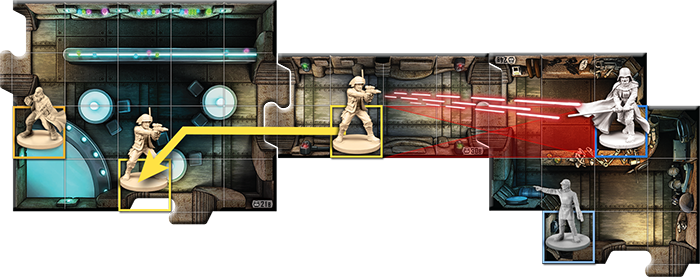
In the diagram above, the Rebel Trooper was focused by Gideon Argus during the previous activation. Now, he can attack Darth Vader with the benefit of Aim and retreat out of range.
The final figure in your strike team is Gideon Argus, a commander who offers indispensable additional movement to keep your forces mobile. He can also Focus your other units, which dramatically increases their combat prowess. What’s more, because the Rebel Troopers excel at stalling your opponent, Gideon Argus can keep your Rebel Troopers focused, making them even more dangerous as you concentrate firepower on your target. As a support figure, Gideon Argus is one of the best you can ask for.
The final two squad points are spent on the Rebel High Command skirmish upgrade. Command cards can often prove the difference between victory and defeat, and Rebel High Command gives consistent access to an additional Command card at the end of every turn!
Follow My Commands
Of course, the figures that do battle on the field are not the only part of your army. As a division of Alliance SpecForces, your strike team will have two primary goals in mind – dodging enemy fire and ensuring that your own attacks are as effective as possible. Every squad list comes with a fifteen-card deck of Command cards that provide the unique tactics and tricks you’ll use to accomplish your primary goals. The squad list here includes the following Command cards:
-
 Marksman
x2
Marksman
x2 - Take Initiative x1
- Take Cover x1
- Fleet Footed x1
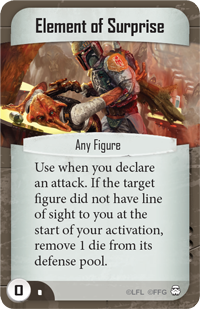
- Element of Surprise x1
- Inspiring Speech x1
- Lock On x1
- I Make My Own Luck x1
- Slippery Target x2
- Rally x1
- Celebration x1
- Planning x1
- Take It Down x1
When you’re attempting to stay out of the way of enemy attacks, it bears noticing that many of the most dangerous units in Imperial Assault, such as the Nexu, Darth Vader, and the Royal Guard Champion, are limited to melee attacks. Because of this, any time you can gain movement points on your opponent’s turn, you may be able to stay out of reach of your opponent’s figures. Slippery Target gives Han Solo and the Rebel Saboteurs the chance to dart away from threats. Alternatively, your soldiers may come under ranged fire when facing a swarm list. Take Cover helps you deflect the attack, and if you use this Command card on Han Solo, it’s much more likely that he can use his Return Fire ability.
Staying hidden and dodging incoming damage is essential, but even more importantly, you need to make sure that your strike team can destroy large, high-priority figures. To this end, the Command deck features a number of cards to maximize damage. Element of Surprise removes a hostile figure’s defense die, Lock On can negate a dodge or boost your accuracy, and Take It Down allows Gideon Argus to coordinate a devastating attack. You can’t take down a villain like Darth Vader in a single shot, but each of these cards bring you closer to removing the leader of your opponent’s strike team. Once you do destroy a hostile heavy-hitter, Celebration brings you closer to victory.

Whether the match is just beginning or you’re closing in on victory, it’s incredibly important to have initiative when you need it. If your opponent has the initiative, he may attack first, potentially destroying your unactivated figures with Darth Vader, or he may move his own weakened figures out of range. Take Initiative and I Make My Own Luck give you two ways to seize the initiative from your opponent, ensuring that your prime target is unable to escape before you close in for the kill.
A final important point is that this list only features five Deployment cards. Because of this, you’ll want to make sure that each of your activations is as effective as possible. You can use Rally to combat this, ensuring that you can easily clear harmful conditions like Stunned or Bleeding without spending valuable actions. Rebel High Command and the Planning Command card help ensure that you have Rally when you need it most.
Take Down the Shield Generator
Whether you’re descending to the forest moon of Endor for a deadly commando raid or sabotaging a prototype starship in an Imperial research station, you can use Han Solo and his team of warriors to dispatch anything the Empire can throw your way.
Next time, we’ll look at some of the new options available to the Mercenaries faction with the IG-88 Villain Pack and the first wave of Imperial Assault figure packs.
Related Products
Rebel Saboteurs Ally Pack
Related News


Raiding the Opposition
The Gray Cap Cantina Raid is Now Available in the Legends of the Alliance App

2019 Star Wars: Imperial Assault Prime Championships
Prizes, Dates, and Locations for the Imperial Assault Prime Championships

