
The Power of Activations
An Imperial Assault Guest Article by Zach Bunn
![]()
“That place is strong with the dark side of the Force. A domain of evil it is. In you must go.”
–Yoda, Star Wars: The Empire Strikes Back
The skirmishes of Imperial Assault pit one strike team against another in a vicious struggle for victory. Darth Vader can lead the legions of the Galactic Empire, Luke Skywalker and Han Solo can strike a blow for freedom, and the mercenaries of the galaxy can hunt down their marks and make a profit on the side.
The Spring tournament season for Imperial Assault is in full swing, and Regional tournaments will soon begin. On these battlefields, you’ll decide the fate of the galaxy with blaster bolts and Lightsabers. Before you enter your first firefight though, you’ll need to muster a strike team that won’t fail you in the heat of battle.
Today, Zach Bunn of Team Covenant has written about one of the most important aspects of Imperial Assault skirmishes: how to manage your figure activations, both during the game and when building an army.
Confronting Yourself
From the first time I saw The Empire Strikes Back, when I was young and impressionable, the scene of Luke entering the cave on Dagobah has stuck with me. I was filled with shake-inducing terror when Darth Vader came around the corner, and I was utterly shocked when Luke defeated Vader to reveal himself inside the mask. It’s powerful stuff.
I couldn't help but remember this iconic scene when I played in our first Imperial Assault tournament at The Covenant Store. As I went undefeated into the last round, there was only one other undefeated player: my good friend Jesse. Jesse had asked for help with his skirmish list the day before the tournament and I had recommended the list I was running. As we met at the final table, I saw he had taken my recommendation to heart – it was a mirror match!

I’ve played a lot of Imperial Assault skirmish, yet up to that point I had never experienced Darth Vader on both sides of the board. It was time to confront myself, or at least a version of myself… and in the final round of my first skirmish tournament no less!
When the lists are the same, there are no immediate advantages for either player. To win a mirror match, you have to manipulate the scenario, the map, and your opponent’s positioning to give yourself a competitive advantage. As I noticed the different choices Jesse and I made, despite playing the same list, it became especially clear how important each player’s activations truly are. What, then, is the best way to manage these activations in the game?
Activation Economy 101
At the beginning of the game, a player has a given amount of available activations: the number of Deployment cards he included in his strike team. Throughout the game, the number of activations available to each player can change based on factors in the game, most notably as units leave the board. At its simplest, good activation economy manages your available activations so that they accomplish more than your opponent’s available activations.
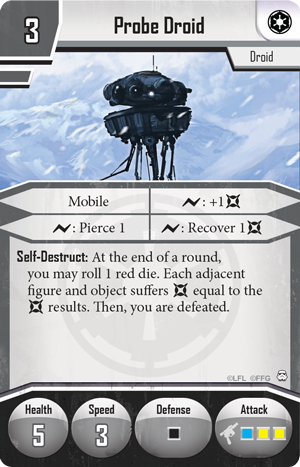
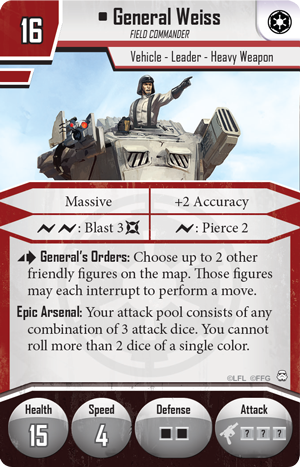
It’s easy to understand what activation economy is, but it’s less apparent how to manage and build toward it. The first inclination with any resource is to say “more is better.” If I build a list of Imperial Officers and Probe Droids , I can get around twelve activations. Should be a winning list, right? Not exactly, as you’d quickly find out during playtesting. Activations don’t have a static value. A Darth Vader activation is much more powerful than an Imperial Officer activation. But we can’t swing the balance too far the other way either. My Darth Vader, General Weiss , Imperial Officer list might be filled with powerful activations, but it loses on objective points because it can’t move and adapt as needed.
There seems to be an ideal number of activations that balances powerful units against number of activations. When creating armies, I’ve found that ideal number to lie between six and eight activations. If I have less than six activations, I immediately feel the tempo disadvantage and can easily be manipulated. If I have more than eight, I don’t have units powerful enough to kill figures and remove my opponent’s activations or preserve my own activations on defense. During gameplay though, managing activations becomes much more intuitive. You want as many activations as possible, and you want to take as many as possible from your opponent.
In skirmish games, players alternate activating their units each round. If you have more activations to take, you can delay taking your most important activations until you have more information. It makes sense, then, that the more activations you have, the easier it is to gain a strategic advantage. There is a snowball effect as activations are removed. By destroying enemy units, you force your opponent to activate their important units before you activate your own, which makes it easier to destroy more units and gain more objective points.
Because of this, properly managing your activations during a game leads you closer to victory. You can help determine a good course of action by asking yourself the following questions before you take an activation.
1. What pending activations (or figures) could my opponent remove on his next activation?
2. What are his odds of removing those activations?
3. What pending activations (or figures) can I remove on my next activation?
4. What are my odds of removing those activations?
5. Which is more important, the activation I might lose or the activation I might remove?
6. Is the action I choose going to cost me scenario points or put me in a weak position moving forward?
7. How does my choice affect my high-level plan for getting to forty points?
Of course, these are just general guidelines. If it were possible to construct a list of questions that gave us the right move, the game would be far too simple. Instead of diving further into theory, let’s take a look at some practical examples in list building.
An Example For a More Civilized Age

As mentioned above, activation economy isn’t simply about quantity, because activations don’t have a static value. Some are more powerful than others. Let’s consider Darth Vader. By using Darth Vader, we gain access to a figure that can easily destroy other figures (removing activations) and is difficult to destroy itself (preserving activations). Darth Vader is a much safer and more threatening activation than a two-point Imperial Officer.
When the game had only been out for a short time and well before I understood how important activations were to the game, I posted a squad list that I called Vader’s Fist to my personal blog:
- Darth Vader x 1
- Stormtroopers x 2
- Royal Guards x 1
- Imperial Officer x 1
At the time, I was happy with the list and the fact that it had ten figures. It seemed like enough to grab objectives and deal some serious damage with Darth Vader. As I came to realize, the issue is that this list only has five activations. After playing numerous games, I realized that a good player with more activations could manipulate Darth Vader and score objectives while I watched. After testing against other Darth Vader lists, I began to see how I could make my own list stronger.

Here’s my current favorite list featuring Darth Vader, with an emphasis on activation economy:
- Darth Vader x 1
- Stormtroopers x 1
- Royal Guards x 1
- Imperial Officer x 4
In this list, I substituted a Stormtrooper squad for three additional Imperial Officers. If you compare three Imperial Officers to a group of Stormtroopers, it may seem that the Stormtroopers have the edge. Their re-roll ability is lethal, and you can activate three figures in a single activation. The Stormtroopers are certainly more of a combat threat, but everything changes if we focus our evaluation on activation economy.
While the Stormtrooper squad activates three models at once, having three Imperial Officers gives you three separate activations. You can use these activations to delay activating Darth Vader, put pressure on objectives, and get in your opponent’s way. Compared to the first list, this list has seven activations at the beginning of the game instead of five. Not only does the list include more activations, it has four models with the Order special ability. Order has a huge impact on a game that is largely about movement and positioning. In a list where Darth Vader is nearly half your points, proper positioning is even more important. Between more activations and greater mobility, this list capitalizes on activation economy in a way that my first list never could.
It Binds All Things
Activation economy, the ebb and flow of activations within a game, is one of the most important concepts to grasp in Imperial Assault. Understanding this single concept makes your lists better and increases your odds of victory. Be mindful of the value of activations whenever you build a list and throughout each game.
In my next article, I’ll go over another extremely important concept for winning skirmish games: Command cards and the Command deck. Until then, may the Force be with you.
Zach
Thanks, Zach!
Zach Bunn is a Star Wars fanatic, a lead member of Team Covenant, and a fan of Imperial Assault. In coming weeks, stay tuned for more Imperial Assault guest articles from Zach and other writers!
Related Products
Related News


Raiding the Opposition
The Gray Cap Cantina Raid is Now Available in the Legends of the Alliance App

2019 Star Wars: Imperial Assault Prime Championships
Prizes, Dates, and Locations for the Imperial Assault Prime Championships

