
Ready for Battle
Preview Four Sample Fleets and Strategies for Star Wars™: Armada

“Well, look at you, a general, huh?”
–Han Solo
Your wait is nearly over. The rules for Star Wars™: Armada (pdf, 27 MB) are now available on the game’s support page, and the Core Set is scheduled to arrive at retailers next week!
The epic two-player miniatures game of tactical fleet battles in the Star Wars universe, Armada grants you the command of a full fleet of starships and fighter squadrons. Assemble your fleet, fly to battle, and blast your way to victory. In Armada, you deliver the commands; you are the one responsible for leading your fleet to victory and, ultimately, shaping the course of history.
In earlier previews, we’ve explored how these ships and squadrons battle and move. We’ve looked at the rules for fleet building, and we’ve explored many of the different ships, fighters, and upgrades available in the game’s Core Set and first wave of expansion packs. Today, we take a look at how all these elements can come together by exploring several sample fleets and the strategies they may employ.

The Armada Core Set contains ten unpainted squadrons, three pre-painted capital ships, nine custom dice, dozens of tokens, nearly one hundred cards, and an innovative maneuver tool that adds a unique feel to the way your capital ships must accommodate for inertia as they maneuver throughout the battlefield!
Two Fleets from a Single Core Set
Your games of Armada start with the Core Set.
Though you can’t build a fleet worth a full 300 fleet points from a single copy of the Armada Core Set, you will still find a lot of room to experiment with your fleet builds, and you can begin to gauge the impacts of the different variations of your starships, the talents of your ace starfighter pilots, and the upgrades you select.
As mentioned in the Learn to Play booklet, if you have a single copy of the Core Set, you are encouraged to play with a fleet worth 180 points, instead of the standard 300 points. Additionally, you’re encouraged to play with a random objective card. In this instance, when the first player would normally select one of the second player’s objectives to use in the game, the second player shuffles all twelve of the game’s objectives, draws two, and selects one to use.
Our first two fleets illustrate some of the Core Set’s many possibilities. In fact, the fleets posted below can both be assembled from a single, shared Core Set.
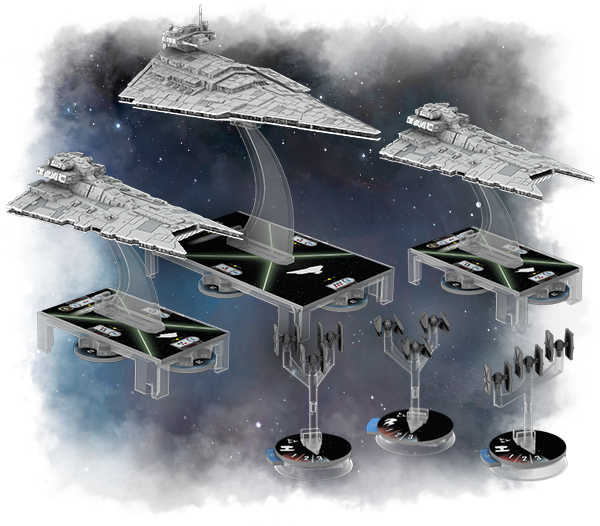
Imperial Navy
Victory II-class Star Destroyer
(85)
Grand Moff Tarkin
(38)
Enhanced Armament
(10)
Dominator
(12)
"Howlrunner" (16)
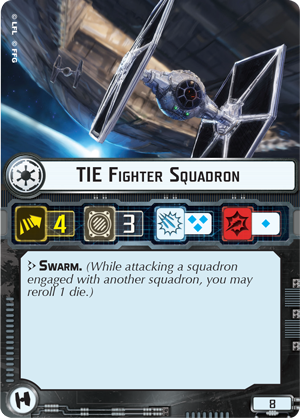
TIE Fighter Squadron
(8)
TIE Fighter Squadron (8)
Total Fleet Points: 177
Rebel Alliance
CR90 Corvette B
(39)
General Dodonna
(20)
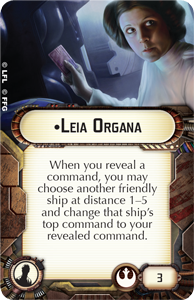
Leia Organa
(3)
Dodonna's Pride
(6)
Nebulon-B Escort Frigate
(57)
Redemption
(8)
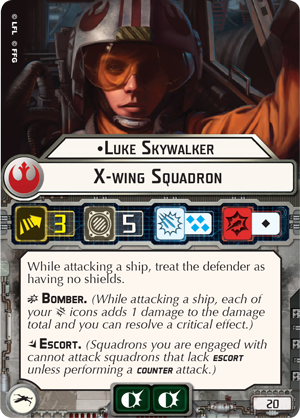
Luke Skywalker (20)
X-wing Squadron
(13)
X-wing Squadron (13)
Total Fleet Points: 179
Imperial Strategy:
This Imperial fleet invests nearly all of its resources into a single, behemoth Victory II-class Star Destroyer. Equipped with both Enhanced Armament and the Dominator title, your ship can fire as many as eight attack dice from its forward hull zone and six dice from its left or right hull zones. With such punishing volleys, you threaten to take out your enemy’s ships anytime you get within medium range.

Accordingly, you don’t want to waste your attacks by directing them at enemy fighters, so your fleet uses of a screen of three TIE fighter squadrons. You don’t need to to destroy enemy fighters; you just need to hold them at bay. Still, the addition of “Howlrunner” and her defense tokens adds to both your fighters’ resilience and their dogfighting capabilities.
Rebel Strategy:
Meanwhile, the Rebel fleet aims to take advantage of Luke Skywalker and Dodonna’s Pride to deal damage directly to your enemy’s hull, bypassing all shields. Simultaneously, you’ll want to use your Nebulon-B Escort Frigate and your two basic X-wing Squadrons to establish a flank, forcing your opponent to attack either one of your ships or the other, but without being able to unleash truly powerful attacks at either.

Two Tournament-Ready Wave One Fleets
Several weeks from now, when the first wave of Armada expansion packs arrives, your fleet-building options will increase exponentially. Both the Imperials and Rebels gain two different commanders around which they can build their fleets, and both gain new starships and starfighters, which all present different tactical advantages. By bringing these elements together in different fashions, you can envision a wide range of viable strategies.
To this end, the fleets listed below illustrate only a tiny fraction of the myriad possibilities within the game.
Imperial Navy
Victory I-class Star Destroyer
(73)
Admiral Screed
(26)
Gunnery Team (7)
Dominator
(12)
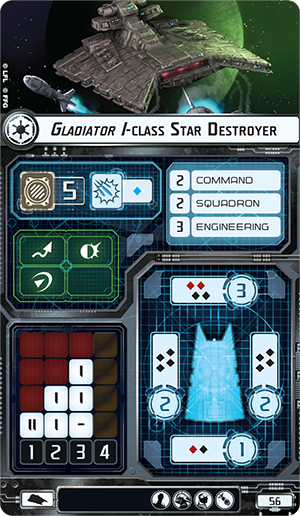
Gladiator I-class Star Destroyer
(56)
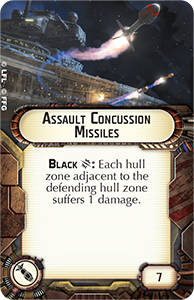
Assault Concussion Missiles
(7)
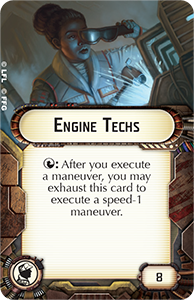
Engine Techs
(8)
Demolisher
(10)
Gladiator I-class Star Destroyer (56)
Assault Concussion Missiles (7)
Engine Techs (8)
Insidious
(3)
TIE Fighter Squadron
(8)
TIE Fighter Squadron (8)
Total Fleet Points: 300
Objectives:
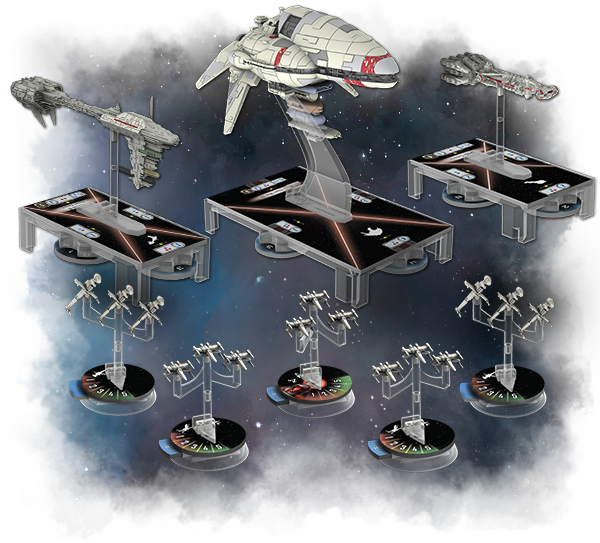
Rebel Alliance
Assault Frigate Mark II B
(72)
General Dodonna
(20)
Gallant Haven
(8)
Nebulon-B Escort Frigate
(57)
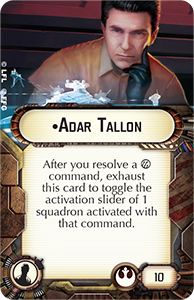
Adar Tallon
(10)
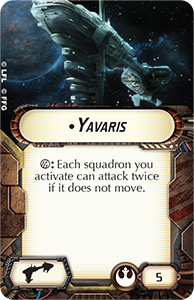
Yavaris
(5)
CR90 Corvette B
(39)
Dodonna's Pride
(6)
Luke Skywalker
(20)
Wedge Antilles
(19)
"Dutch" Vander
(16)
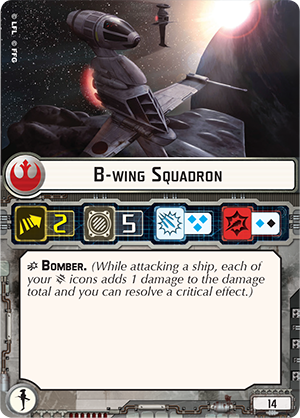
B-wing Squadron
(14)
B-wing Squadron (14)
Total Fleet Points: 300
Objectives:
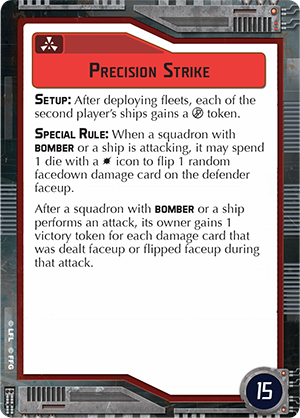
Precision Strike
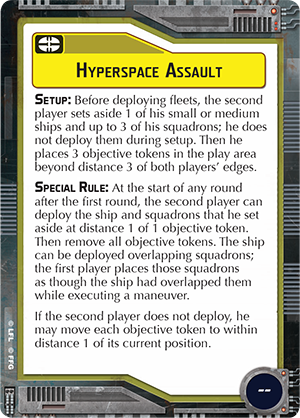
Hyperspace Assault
Superior Positions
Imperial Strategy:
The first thing you might note about this Imperial fleet, compared to the Core Set fleet, is that it makes use of two Gladiator I-class Star Destroyers and Admiral Screed. The goal is to take advantage of the Gladiator’s speed to race into close combat with enemy ships. Your Engine Techs are tremendously valuable, here. Once you get into range to attack with all your dice, Admiral Screed guarantees you at least one black
 result per activation per ship, and that means you can trigger your Assault Concussion Missiles for two extra damage, assigned to the hull zones adjacent to the one you’re targeting.
Moreover, because the Gladiator I-class Star Destroyer can fire four attack dice from both its left and right hull zones, it helps you counter any plans the Rebels might have to flank your Victory I-class Star Destroyer.
Your selection of objectives further emphasizes your ships’ massive firepower. Few Rebels would ever dare to let you fire twice from the forward hull of your Victory I-class Star Destroyer, and just as few are likely to allow you to use Hyperspace Assault to drop your Victory and a screen of TIEs directly into a flanking position behind their most important ship. Thus, if you’re the second player, you’ll almost always end up playing with Minefields, and you’ll want to practice using the obstacles and mines to set up a battlefield that forces you and your opponent to fly straight at each other.
Rebel Strategy:
On the other hand, the Rebel fleet doesn’t try to match Imperial ships one for one. Instead, it takes advantage of the Rebellion’s fighter squadrons and their strengths. For starters, the Yavaris and Gallant Haven allow your squadrons to attack more often and survive longer. So long as you can keep your capital ships intact, your squadrons, led by Wedge Antilles, should make short work of opposing fighters, and then you can use them to swarm enemy ships.
This strategy is further enhanced by its objectives. Like the Imperial fleet, this one uses Hyperspace Assault to flank its foes. However, the objective is arguably more impactful in this fleet because it doesn’t just allow you to ambush your opponent with one of your capital ships and up to three fighter squadrons; it allows you to bring those vessels into firing range against the weaker rear arc of whichever enemy ship you target. Meanwhile, Precision Strike and Superior Positions both allow you to seize victory points with your squadrons, not just your capital ships. That means you can force your opponent to consider attacks from eight different directions, and your squadrons may even draw your enemy’s fire away from your capital ships.
Notably, though, this Rebel fleet can be a little tricky to coordinate. You have ships and squadrons with several different speeds. Among other concerns, your B-wing Squadrons are slow; there’s just no other way to put it. However, those B-wing Squadrons can more than earn their inclusion as soon as you get them into range of a slow-moving enemy ship. Due to the rules for collisions, each time your opponent runs into your B-wing Squadrons, you can move them back in front of the ship, forcing that ship to dramatically adjust its speed, or run into your squadrons over and over, allowing you to keep them in firing range round after round after round.

In this example, the Rebel player’s CR90 corvette overlaps two fighter squadrons.
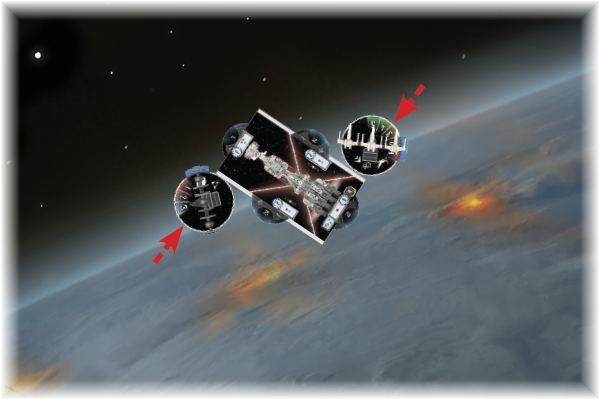
After the Rebel player finishes the corvette’s movement, the Imperial player replaces all of the squadrons that the corvette overlapped. In this way, the TIE Fighter Squadron gain some distance from the X-wing Squadron and can end up adjacent to any edge of the corvette’s base.
Additionally, you need to keep your ships in close range of your fighters in order to command them and take advantage of the abilities of the Yavaris and Adar Tallon. In turn, getting your fighters into position may force your ships closer to the enemy than you’d like, so you’ll want to practice your flanking maneuvers and experiment with the best orders for your commands.
The Fleet Is Yours
The fleet is yours. The enemy is nearly within firing range. Ready your guns, and command your ships into position. Star Wars: Armada arrives at retailers next week, the rules are now available for download, and the Star Wars galaxy will soon tremble with the fury of your battles!
No products found.
Related News


OP Announcement From Atomic Mass Games
News on the World Championships for Star Wars™ Miniatures Games.

